How to Move a Heavy Desk Alone, Step-by-Step
Now that you've done your prep work and have your tools, you're ready to move heavy furniture alone using a safe and methodical process. Let's break it down step by step.
Step 1: Empty and Disassemble Your Desk
Start by removing everything from and around your desk. Take out all drawers, clear the surface completely, and unplug any electronics. Remove desk accessories like keyboard trays, hutches, or side panels if possible.
- Document the setup: Take photos of any cable layout and desk configuration before disassembling anything.
- Remove drawers completely: If possible, you shouldn’t just empty the drawers, but take the entire thing out of the desk frame to reduce weight and prevent sliding during transport.
- Unscrew removable legs: Many desks have legs that detach with just a few screws, which reduces the main body's weight and size.
- Secure loose hardware: Place all screws, bolts, and small parts in labeled bags taped to the desk or drawer bottoms.
Step 2: Tilt and Lift One Side Carefully
Never try to lift the entire desk at once. Stand at one of the shorter ends, get a firm grip, bend your knees, and lift with your legs to tilt that side up. Follow these techniques:
- Test the weight first: Lift just slightly to gauge the desk's weight and your ability to control it safely.
- Use the corner grip: Grab the desk at the corner points where the frame is strongest, avoiding decorative elements or thin edges.
- Lift incrementally: Raise one side just enough to slide equipment underneath. You don't need to lift the entire desk off the ground.
- Maintain control: If the desk feels too heavy, unstable, or you have difficulty lifting it, lower it immediately and consider getting professional help.
Step 3: Use Sliders or a Dolly to Move Across Rooms
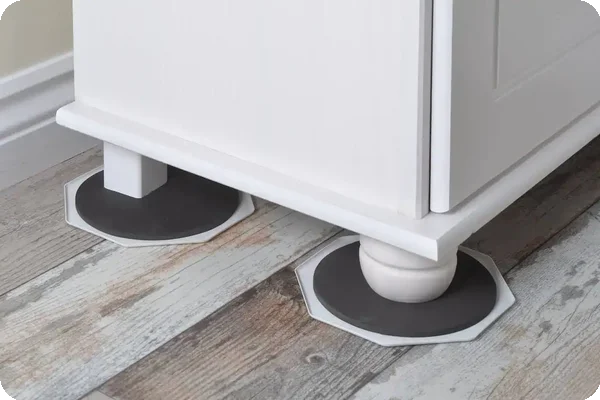
With furniture sliders under the legs, you can gently push the desk across the room. If you're using a dolly, make sure the desk is balanced in the center before you start rolling. Push the desk slowly and steadily, keeping your hands on it to guide its direction and speed. Take your time, especially when you first start moving.
Step 4: Navigate Corners and Door Frames Safely
Corners and doorways are the trickiest parts. Approach them slowly and at an angle. You may need to pivot the desk carefully so that it passes through the frame. If it's a tight fit, turn the desk fully on its side to get through the doorway. Don’t forget: Having your path pre-measured will save you from getting stuck.
Step 5: Reassemble in the New Location
Once your desk reaches its destination, reverse the disassembly process. Start with the main frame positioning, then add legs, drawers, and accessories.
- Check for damage: Inspect the desk thoroughly before reassembling to document any transport damage.
- Reference your photos: Use the setup photos you took earlier to restore cable arrangements and accessory placement.
- Test stability: Rock the desk gently and check all connections before loading it up with your computer and supplies.