How to Move a Chest Freezer

A white chest freezer with its lid open

Figuring out how to move a chest freezer can be tricky — they're wide and often weigh 100 pounds or more. Plus, they feature sealed cooling systems that are easily damaged in transit. However, you can move one if you follow the right steps: empty and defrost it, secure it upright to a platform dolly, load it into the moving truck correctly, and wait at least 4 hours to plug it back in once at your new home. You may be able to move smaller freezers alone, but it's safer to hire movers to help.

HireAHelper has helped hundreds of thousands of people complete successful moves by connecting them to professional movers on our platform. We’ve seen all kinds of moves with all kinds of items, including chest freezers. In this guide, we'll explain exactly how to relocate a bulky freezer safely, including preparing it, all moving instructions, and post-move setup.


Last updated: Jul 06, 202610 min read
Melanie Morris
Written byMelanie Morris

Key Takeaways

  • Unplug the freezer, remove all food, and fully defrost it before moving to reduce weight and prevent leaks.
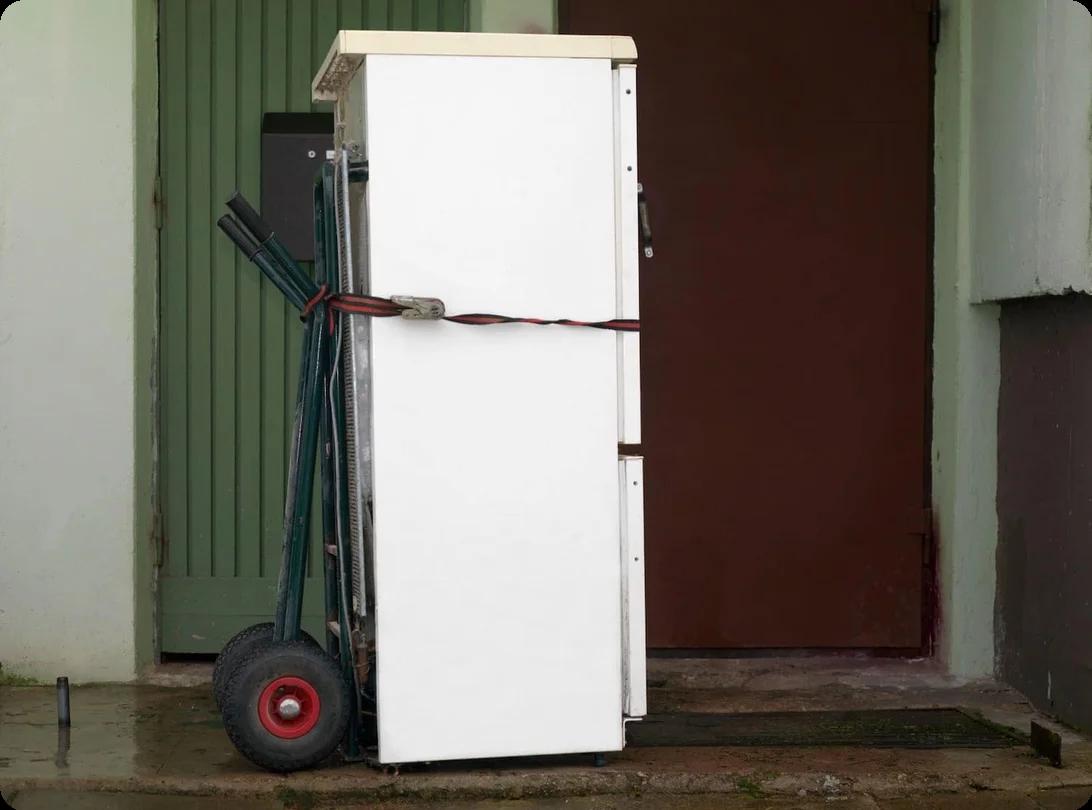
  • Use a flat platform dolly (not a hand truck) and ratchet straps to secure the chest freezer.
  • Keep the chest freezer upright — laying it on its side can push compressor oil into the coolant lines.
  • Wait at least 4 hours (or 24 hours if it was tilted) before plugging the freezer in.
  • Hire moving labor for heavy freezers or to help you navigate stairs.
Melanie Morris
Author

Melanie Morris

Melanie Morris is an editor and writer at HireAHelper, where she uses observational skills honed from over 7 years of experience (and too much detective fiction) to demystify moving and make sure typos remain at a minimum.

Moving from the southwest up and down the west coast and back again has also given her plenty of firsthand moving experience. Now, she makes sure that even if you're just moving down the block, you have the accurate tips and know-how to make your relocation a breeze.

Can You Lay a Chest Freezer on Its Side?

You should never move a chest freezer on its side, if you can avoid it — tilting it too far allows oil to flow from the compressor and into the coolant lines, damaging the cooling system. When you plug it back in, the compressor could overheat or fail to freeze.

Instead, you should always transport chest freezers upright. This protects the cooling system and allows faster setup in your new home.

If that's not possible, you can take steps to reduce the risk. Appliance manufacturers recommend laying the freezer on the side with the compressor (check your manual for the location). If you can, try to limit the tilt angle to no more than 45 degrees. Minimize the time the freezer is tilted, even if that means leaving a pathway through the truck to load it later.

What You'll Need to Move a Chest Freezer

Before you start on anything else, you should gather a few key supplies. It’s always better to have everything you need ahead of time so you don’t have to run out to the hardware store in the middle of the move. Here’s what to have on hand to protect yourself and the freezer:

  • Flat platform dolly: These are large enough and sturdy enough to handle something a chest freezer’s size. Don't use a hand truck.
  • Ratchet straps: These are used to secure the freezer to dollies and into the moving truck
  • Packing tape: You’ll need this to secure the lid and power cord
  • Towels: Moving a freezer means you’ll have to let things defrost, and that can create a mess. Use towels to wipe up any moisture.
  • Cooler and ice packs: If you can’t use up all the food in your freezer before the move, you’ll have to store it in a cooler.
  • Work gloves: Freezers have smooth surfaces, so you’ll need gloves to give you a firm enough grip.

How to Move a Chest Freezer: Step-by-Step

Start preparing your chest freezer for moving at least 24 hours in advance. You'll need to empty the food from it, defrost, clean, and dry the interior before loading it into a moving truck. A completely dry and empty freezer is a lot lighter, and it won't leak in your moving truck. It's also less vulnerable to mold, mildew, and bacterial growth in transit.

If you have a large or heavy chest freezer, or if you can't find helpers, consider hiring professional movers. They have the equipment and experience to navigate the ramp and secure the freezer inside the moving truck.

Step 1: Empty the Freezer and Store Your Food

At least a day before your move, remove all remaining food from the chest freezer, and categorize it based on how quickly you'll need to eat it. Then, pack it into coolers with plenty of dry ice or ice packs. This process lightens your load and preserves the food — plus, you won't have to worry about leaks from thawing meat and veggies.

"Once you plug the freezer in, give it about 4 to 6 hours to run; it needs time to cool down to the correct temperature. If you put the food in too early, the compressor has to work harder to keep it cool…"

If you’re moving more than 2 hours away, you might want to consider eating through the frozen food in the weeks leading up to the move.

Once the food is out of the freezer, take out the shelves, baskets, and dividers. Wash and dry them, and pack them separately to prevent rattling and protect them from damage.

Step 2: Defrost, Clean, and Dry the Chest Freezer

You should always defrost a chest freezer before moving it — a frosted freezer adds unnecessary weight and could cause water leaks during transport.

To defrost the freezer, unplug it and open the lid. If you're short on time, you can place pots or bowls of hot water on the shelves. It's also helpful to point a fan at the inside of the freezer. Although it might seem tempting, don't use a hair dryer, heat gun, or ice picks to remove the excess ice. These tools can damage your cooling coils or poke holes in the protective lining.

While the freezer is defrosting, place towels inside to soak up the water before it has a chance to leak out onto the floor. You can also place more towels around the base of the freezer for extra protection.

Once it’s defrosted, wipe it down with a solution of baking soda and water and dry it thoroughly with clean towels to prevent mold or mildew from growing inside.

Step 3: Secure the Lid, Cord, and Loose Parts

When your freezer is defrosted and clean, close the lid and tape it down with packing tape to prevent it from flipping open during loading and unloading. Avoid using duct tape, which can leave a sticky residue on the surface.

Then, roll up the power cord, and tape it to the back or side of the freezer so it won't get damaged during loading and transit or catch on doorways. If your freezer has a drain plug, make sure it's tightly closed. The drain plug is usually located near the bottom of the back or front panel. Check to make sure the interior and exterior caps are firmly in place to keep out dirt, debris, and insects.

Step 4: Position the Freezer on a Dolly

Once it’s prepped, you need to move your freezer onto the dolly. As much as possible, keep the freezer upright while you're loading it. If you need to tilt the freezer, remember to let it rest for a little longer before plugging it in at your new destination.

You should also have at least one helper for this part. It’s very difficult and risky to move a large chest freezer by yourself.

Here's how to put a chest freezer on a dolly:

  • Lift one side of the freezer, and roll a flat platform dolly underneath it.
  • Lower the freezer, keeping the dolly steady.
  • Center the freezer on the platform to distribute the weight evenly.
  • Don't use a two-wheeled hand truck — a wide, flat dolly supports the wide base of the freezer more securely.
  • Lay ratchet straps over the freezer, attach to the dolly on either side, and tighten.

Step 5: Navigate Doorways, Stairs, and Tight Spaces

You should measure doorways and hallways before moving day — chest freezers are wider than most appliances, and the top-opening lid doesn't always allow you to tilt the unit. If the freezer is wider than standard interior doorways, you may need to remove the door for extra clearance. Also, walk the pathway you plan to take, and remove any obstacles that might get in the way or cause you to trip.

If your freezer is wide, think about protecting narrow doorways, walls, and banisters. Wrap them in moving blankets to prevent dings and dents. A little extra padding also helps prevent damage to the freezer.

If you’re dealing with stairs, don't use a flat dolly. Instead, use a stair-climbing appliance dolly. And if you're unsure, hiring experienced moving labor is the safest way to move a chest freezer down or up stairs.

Step 6: Load the Freezer Into the Truck

To get the freezer into the truck, roll the dolly slowly up the ramp, with one person pushing from the back and another pulling from the front. Watch the wheels of the dolly carefully, making sure they're straight. If they shift, stop and reposition them to keep the freezer on track.

Once the dolly is inside the moving truck, roll it to the back and push it against the wall. Use straps to tie it to the interior anchor points, so it can't move around while you drive.

If you can't put the freezer against the back wall, position it as far back as possible. Keeping heavy items closer to the cab helps balance the load.

Step 7: How to Set Up a Chest Freezer After Moving

How you set up a chest freezer after moving is just as important as how you move it, since the setup process determines whether the cooling system works properly. You'll need to wait before plugging in the freezer to protect the compressor and coolant tubes.

If your chest freezer was upright during the entire loading and moving process, you should wait a minimum of 4 hours before plugging it in. If you tilted it or transported it on its side, wait at least 24 hours. This gives the compressor oil and refrigerant time to settle. Plugging in the freezer too early forces the compressor to run without enough lubrication, which can cause it to fail.

Once you plug the freezer in, give it about 4 to 6 hours to run; it needs time to cool down to the correct temperature. If you put the food in too early, the compressor has to work harder to keep it cool — and the warmer temperatures can create food-safety issues.

Tips for Moving a Chest Freezer by Yourself

Moving a chest freezer by yourself is possible, but only if the unit is small enough for you to lift and maneuver comfortably. Even then, it's safer to have another person to help.

Here's how to move a chest freezer by yourself:

  • Check the weight: If the freezer weighs more than you can lift without struggling, don't try to move it alone.
  • Clear a path: Decide which route you'll take, and make sure it’s free of obstacles and tripping hazards.
  • Use furniture sliders: Minimize lifting by slipping sliders under the freezer to move it to the dolly.
  • Choose the right dolly: A dolly with a built-in strap system can provide extra security.

If you have stairs or ramps, don't move a chest freezer on your own. You could damage the appliance or get seriously injured. If you need help, HireAHelper can connect you with affordable local moving labor — even same-day.

Frequently Asked Questions

Recent Articles

Two people using moving straps to safely lift a heavy dresser in a living room

A Pro's Guide to Moving Heavy Furniture Without Hurting Yourself

Loading & Unloading

If you've ever tried to figure out how to move furniture up stairs, you know that it can be a minefield of injuries and scratched walls. But you can maneuver those tight spaces and awkward corners without injuring... Read More

A golf cart parked on a golf course

How to Move a Golf Cart

Loading & Unloading

Moving a golf cart requires more than just a standard trailer and a few straps to tie it down. To move your cart safely, you’ll need to choose the right transportation method, like a utility trailer or truck bed,... Read More

A trampoline with a net sits in the corner of a backyard with a green lawn and trees

How to Move a Trampoline

Loading & Unloading

Moving a trampoline is often cited as one of the most physically demanding parts of a backyard relocation because of its awkward size and heavy steel frame. To move one, you can either move it a short distance with... Read More

A four-wheeled furniture dolly with a padded top, ready to support heavy furniture during a move

What’s a Furniture Dolly, and How Do I Use It for Moving?

Loading & Unloading

Your first glance at a furniture dolly might evoke memories of middle school gym class, where kids sat on scooter boards and pushed themselves after a ball. But this humble tool can make a big difference when... Read More

a wooden outdoor barrel sauna

Take the Heat with You: How To Move Your Sauna

Loading & Unloading

A sauna is an expensive investment, so it makes sense that you want to hold on to it when you’re planning a move. Plus, there's nothing like heat to soothe sore muscles after a move.

The U.S. sauna market is still... Read More

A riding lawn mower being securely strapped onto a utility trailer for transport to a new home

How to Transport a Riding Lawn Mower

Loading & Unloading

Riding lawn mowers make yard work faster and easier, but they’re also bulky, heavy, and awkward to move. Whether you’re selling your mower or relocating with it to a new home, knowing how to transport a riding... Read More