How to Pack Oil Paintings for Moving, Shipping, or Storage

a woman takes down an oil painting from a tall wall that has many more covering its surface

Moving oil paintings can be stressful—the thick paint, brittle varnish, and moisture sensitivity create fragility that's tough to maneuver around. Successfully moving an oil painting comes down to thorough preparation: inspect the painting for vulnerabilities, wrap the front, protect the corners, and be sure to cushion it.

At HireAHelper, we know what works and what doesn't. After so many years in the business, we've seen movers successfully transport everything from heirloom portraits to gallery canvases. In this guide, we'll walk you through how to pack oil paintings using professional methods. We'll cover the best supplies, step-by-step wrapping instructions, and long-term storage tips.


Last updated: Jun 24, 20269 min read
Melanie Morris
Written byMelanie Morris

Key Takeaways

  • Always pack and move oil paintings upright, never flat. Laying a canvas flat lets it sag and stretch over time.
  • Never let bubble wrap touch the paint. Wrap the front in acid-free glassine first, add corner protectors and rigid boards, then cushion with bubble wrap on the outside.
  • Let fresh paint cure before packing, which can be as long as 6 months or more for thick oil paintings.
  • If you're shipping your paintings, you'll need more protection. Use the double-box method (or a wooden crate for high-value, oversized, or antique pieces) and add declared-value insurance.
  • In storage, make sure you're keeping your paintings in a climate-controlled unit (65–75°F, 40–55% humidity).
Kevin The Mover
Author

Kevin The Mover

Kevin Kato is a travel and home services writer with over 20 years of experience as a professional mover.

Having been both a professional mover and a crew leader, Kevin has seen it all in the world of moving: hectic moves, unique packing, bizarre accident claims, truck mishaps, or just run-of-the-mill moves as advertised; there is virtually no situation Kevin hasn't managed. Today, Kevin provides his insights as Kevin The Mover for professional movers and "movees" everywhere.

Supplies Needed to Pack Oil Paintings Safely

You don't need a museum team to safely move an oil painting, but you do need the right tools. Here's what to gather before you get started:

  • Glassine paper: This smooth, acid-free paper provides a breathable barrier that won't stick to oil paint.
  • Corner protectors: Foam or cardboard sleeves guard vulnerable corners from bumps and dents.
  • Foam boards or cardboard sheets: These flat sheets sandwich the painting to prevent punctures.
  • Acid-free tissue paper: This provides extra padding without leaving unwanted marks or stains.
  • Bubble wrap: This offers soft cushioning for the outside layers. Never apply bubble wrap directly to the paint, because it can leave a permanent texture imprint.
  • Silica gel packets: These control humidity when you're shipping or storing the paintings.
  • Plastic stretch wrap: This wrap holds layers together and keeps protective boards snug.
  • Packing tape and painter's tape: These are ideal for securing paper layers without leaving residue or damaging finishes.
  • Moving blankets: These add a thick buffer around the box during the move.
  • Markers and fragile labels: Clearly label the box or use a color-coded system so it's treated with care from the moment it's picked up.
  • Wooden crate: If needed, you can use a sturdy crate for shipping high-value or very large paintings.

You can find most of these materials at your local art supply store. Hardware chains, packing retailers, and online shops also sell these helpful moving supplies.

Step-by-Step Guide on How to Pack Oil Paintings for Moving

Oil paintings are extremely sensitive to touch, pressure, and temperature changes. You should always pack and move them in an upright position. If you need help with the heavy lifting, labor-only movers can assist with loading fragile items like antiques into your truck.

Here's how to pack oil paintings in just 6 easy steps:

Step 1: Set Up Your Workspace and Inspect the Painting
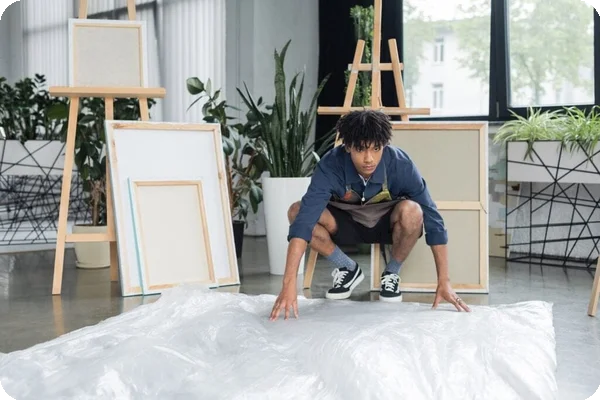
A man with several painting canvases and easels behind him spreads a protective covering over the floor

Lay the painting flat on a clean, dry surface. If it has glass, place two strips of painter's tape in an X across the front to contain shards in case the glass breaks. Check the frame, back hardware, and any hanging wires for issues, tightening screws, or removing hooks that could catch on packing material as you go. If the painting is unframed, inspect the canvas for tears, warping, or protrusions.

Remember that oil paint must be dry to the touch before packing. Freshly painted pieces should be left to cure completely, which can take weeks or longer depending on the conditions.

Step 2: Wrap the Front of the Painting in Glassine

Cut a sheet of glassine paper slightly larger than the artwork. Lay it over the surface, gently smoothing it down. If the canvas is unframed, wrap the paper around the edges. Use painter's tape to secure the paper to itself or the back of the stretcher — never tape it to the painted surface, the frame face, or decorative trim.

Step 3: Add Corner Protectors and a Rigid Support Layer

Slide foam or cardboard protectors onto each corner. Then, place one foam board over the front and another against the back, creating a rigid, flat shell around the painting. Wrap the entire thing in stretch wrap or use painter's tape to hold it all together.

Step 4: Cushion the Painting with Bubble Wrap (Over Paper Only)
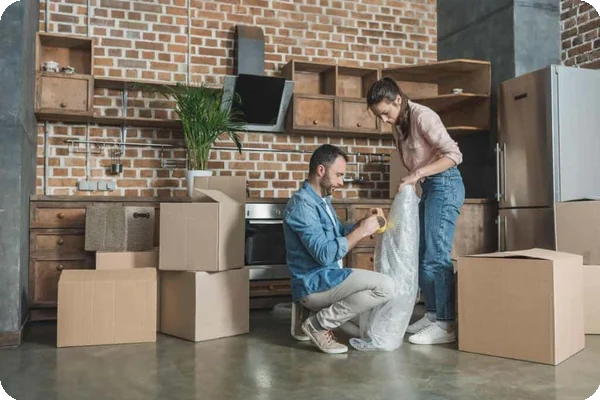
a couple wraps a painting in bubble wrap

Add 2–3 layers of bubble wrap around your protected painting. This cushioning should only go over the glassine paper and rigid foam boards. Never let the plastic bubbles touch the oil paint directly. Wrap horizontally and then vertically to cover all angles before securing the outermost layer with packing tape.

Step 5: Place Upright in a Fitted Box

Select a mirror or picture box from a local hardware store, big enough that the wrapped painting fits snugly inside. You can also find these special boxes at moving supply shops and truck rental companies. Pad the bottom and sides with crumpled packing paper to create a soft cushion.

“If you plan to rent a storage unit to store your painting, choose one with climate control. Keep the room between 65°F and 75°F with humidity around 40–55%.”

Be sure to slide the painting into the box upright, just like it hangs on a wall. Never pack or load it flat, because the canvas can sag and stretch over time. If your painting is oversized or very valuable, you might want to use a custom wooden crate instead of a cardboard box.

Step 6: Seal and Label the Box Clearly

Close the box and use strong tape to seal every seam and corner. Next, grab a thick marker or use bright stickers. Label multiple sides of the box with the words "FRAGILE" and "THIS SIDE UP." This ensures your warnings are clearly visible regardless of how it is handled.

Packing Framed vs. Unframed Oil Paintings

Whether your artwork has a heavy wooden border or bare canvas edges, you have to treat it with care when packing for a move. Framed and unframed oil paintings require slightly different steps to stay safe. We cover more information on how to protect both styles below.

Packing Framed Paintings (With or Without Glass)

Frames add structure to your artwork, but they also add heavy weight and fragile details. Ornate frames especially have delicate pieces that can snap off if they're bumped. You also need to make sure the frame doesn't shift inside the box. Here are our top tips for packing framed paintings:

  • Use the X tape method: Apply painter's tape in a large X across any glass to prevent shattering.
  • Add extra padding: Wrap ornate frames with soft foam or extra bubble wrap to protect delicate carvings.
  • Remove hanging hardware: Take off wires and metal hooks so that they don't scratch your other items.

Packing Unframed Canvas

On an unframed canvas, the painted surface is completely exposed. Without a solid border to absorb bumps, you need to build a rigid shell. Follow these suggestions to protect your bare canvases:

  • Avoid front pressure: Never let anything press against the canvas, because it can stretch the fabric.
  • Protect the corners: Slide foam protectors over the bare edges to stop them from bending or fraying.
  • Never stack face-to-face: Keep canvases separated with stiff boards so the painted surfaces never rub together.

How to Pack Oil Paintings for Shipping

To ship delicate paintings, you'll need stronger boxes and better shock absorption for the longer trip. We suggest using the double-box method. Just place your packed inner box inside a slightly larger outer box filled with foam.

Here are a few other important considerations on how to pack oil paintings for shipping:

  • Keep them upright: Ship your canvases standing up to prevent the fabric from sagging.
  • Choose the right carrier: You can send small pieces through standard parcel services, but use a freight carrier for large art.
  • Buy declared value insurance: Protect your investment in case the shipping company damages or loses your package.
  • Require a signature: Ask for signature-required delivery to stop drivers from leaving packages unattended on a porch.
  • Expect different costs: Budget around $50–$150 for small items, but keep in mind that shipping large pieces can cost several hundred dollars.

When to Use a Wooden Crate

When you learn how to pack and ship oil paintings, you'll quickly realize that a standard cardboard box is sometimes not enough. You should use a custom wooden crate for high-value art, oversized canvases, and antique frames. These crates also offer the best defense against punctures and rough handling when shipping internationally.

How to Pack and Store Oil Paintings Long-Term

Make sure to store your art vertically on a shelf or a pallet. Never lean paintings at sharp angles against a wall. This can cause the canvas to stretch or sag over time, which ruins the surface.

“Bubble wrap should only go over the glassine paper and rigid foam boards. Never let the plastic bubbles touch the oil paint directly.”

If you plan to rent a storage unit, choose one with climate control. Keep the room between 65°F and 75°F with humidity around 40–55%. Avoid basements or attics, as they get too damp or hot. Also, don't use airtight plastic for long periods, because it can trap harmful moisture.

Mistakes to Avoid When Packing Oil Paintings

To keep your art safe, you need to know exactly what not to do when packing, transporting, and storing your oil paintings. Here are the most common mistakes to avoid:

  • Packing before the paint cures: Never wrap a fresh painting until it's completely dry to the touch.
  • Putting bubble wrap on paint: Applying plastic directly to the canvas leaves permanent marks. We recommend using glassine paper first.
  • Using newspaper for padding: The ink from old newspapers can easily rub off and permanently stain your artwork.
  • Laying the canvas flat: Placing art flat inside a moving truck causes the heavy fabric to sag and stretch.
  • Ignoring temperature and humidity: Extreme heat and trapped moisture will warp the wood stretcher and crack the delicate paint.
  • Taping decorative surfaces: Avoid sticking strong packing tape directly onto the painted canvas or a fragile frame. It can leave residue or other damage.
  • Using loose packing materials: If the painting can wiggle inside the box, it's more likely to suffer from impact damage.
  • Not documenting the condition: Always take clear photos of your art before packing it to have evidence of its exact original condition. This is helpful if it gets lost or you need to file an insurance claim.

How Much Does It Cost to Pack and Ship an Oil Painting?

Your moving costs will change based on the artwork's size. Shipping a small painting usually costs $50–$150, while a large framed piece runs $200–$500+. Custom wooden crates often start at around $300. Finally, adding insurance coverage generally costs about 1%–2% of the item's total value.

Unpacking and Rehanging an Oil Painting

Once you arrive at your destination, you might want to get your precious artwork on the walls as soon as possible to make the place feel like home, but resist the urge to unpack quickly. Follow these tips to finish the move on a strong note:

  • Let the box sit: If the painting has experienced extreme cold or heat, allow it to reach room temperature before opening to prevent moisture condensation and potential warping.
  • Cut with care: Use a sharp blade or scissors to slice through the tape on the box flaps. Keep your cuts shallow and angled away from the contents.
  • Remove layers slowly: Take off bubble wrap, boards, glassine, corner protectors, and tape in stages.
  • Peel off the glassine: If it sticks, wait a few more minutes for the materials to settle. Once removed, check the painted surface carefully.
  • Inspect for damage: Look for surface blemishes, cracked varnish, flaked paint, or bent frame corners. If anything seems off, pause and consult a local art restorer before handling further.
  • Rehang in a safe spot: Choose a location away from direct sunlight, moisture, fluctuating temperatures, or high-footfall areas.

After all that care, it's satisfying to see your oil painting back on the wall — safe, intact, and perfectly placed.

Frequently Asked Questions

Recent Articles

An artist carefully packing brushes, paints, canvases, and art tools into protective boxes for a move

How to Pack Art Supplies for Moving

Packing

Packing an art studio can feel more complicated than packing the rest of the house. Instead of neatly shaped household items, you may be dealing with paints, delicate brushes, unfinished work, fragile ceramics, and... Read More

Mover packing a cardboard box during a move

How Long Does Professional Packing Take?

Packing

Professional packing can take anywhere from 2 hours for a small apartment to a full day or more for a larger home. The actual timeline depends on how much you own and how prepared you are when the crew arrives. In... Read More

Stack of cardboard moving boxes with bubble wrap and packing tape

Do Packers Bring Their Own Boxes and Supplies?

Packing

Packers do not always bring their own boxes, including when you book labor-only packing help directly or through HireAHelper. What supplies they bring depends on the type of packing service you choose. With... Read More

Toiletries and props arranged on a bathroom washbasin

How To Pack Bathroom Items for Moving

Packing

The bathroom can be tricky to pack. It’s one of the last rooms you get to because you use it regularly, and it’s filled with items that can break or spill, but there are techniques to make this area easier to move.... Read More

Woman keeping boots in a cardboard box at home

How to Pack Shoes for Moving: A Step-by-Step Guide (2026)

Packing

You might think shoes are easier to pack than glassware or your TV, but if you just throw them into a large bag without following the proper steps, you might end up with scuffed leather, bent heels, or a moldy pair... Read More

Patio furniture cleaned and wrapped for moving

How To Pack Patio Furniture for Moving

Packing

Patio furniture tends to be heavy, collect dirt from outside, and have irregular shapes that don’t fit well in standard boxes. But packing them for a move isn’t impossible with the right process. If you clean each... Read More